


On this tutorial we will achieve a natural looking material that can help us get nice car renders with little to none complications that works on most environments.We will go through a set of techniques from different artists and also my own analysis on how to get a working Car Paint Material. This tutorial would have three parts.
First I want to ask for a round of applause for all the Patrons that made possible to create this tutorial. With your amazing contribution we made it this far!

When working with car paints one of the first thing that we need to now is the layers and how do they blend on the material over the metal to give the effect.
A lot of artist has been working on this approach for some years now and we are going to test some of their techniques and see how they work with Redshift and to see if we can add more information and give good results.
One of the main artist of the field of Car paint materials is Jeff Patton, and we are going to use some of his techniques here and check the result compared to the new info that the Vray Scans gave us of the microscopic behavior of the flakes.
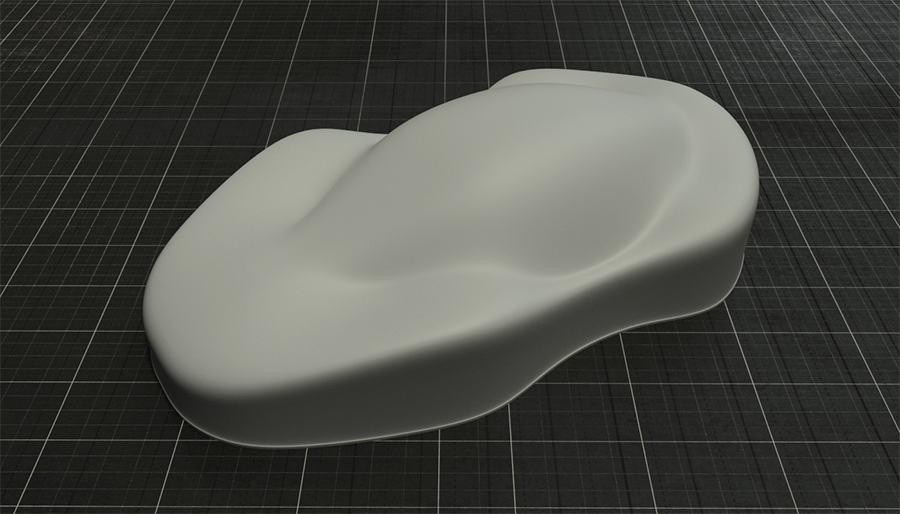
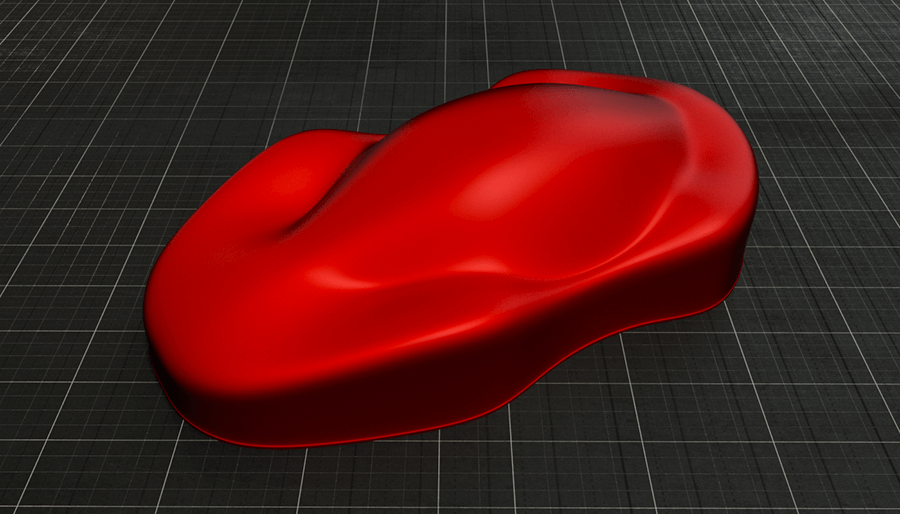
You can start using the model for your own test, we are going to use it from time to time when working the materials.
LAYERS
The car paint process is a complex one, on the physical world it takes from the bare metal to the final finish, it depends on the process but mostly we have from 5 to 6 stages here. On the 3D world its different we can start from the base color to generate the final result. Here you can find an example of a real world painting process.
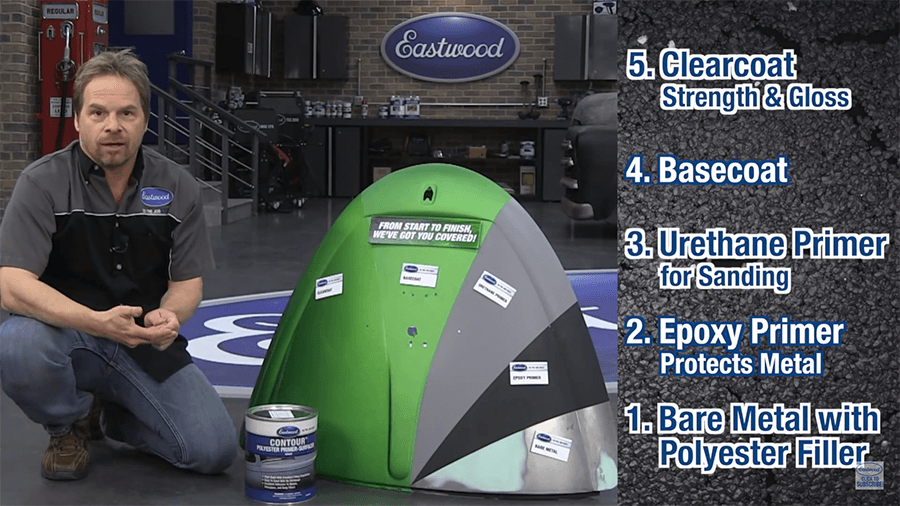
With this example in mind we need to think on how to solve the problem, the stages 1 and 2 does not matter for the 3D because they do not affect colors. For the Stage 3 it could affect the color on the real world if the value of the gray is darker or white-ish. But again we can just ignore that step also and start directly from the basecoat layer and add after that the clear coat and gloss. And for the 3D version we will need to add the flakes layer also when we want to add them to the shader. Lately most of the new cares have very little flakes or none, but it depends on the actual car.
FIRST LAYER: THE BASECOAT

If we keep using the same reference here and if we look closer into the reference on the image on the basecoat layer we have some minor reflections on the borders and also a darker color near the 90 degrees.
Now we need to generate the same effect, based on the camera angle we need to map the color to have an slighty saturated color near to 0 degrees and a darker color close to 90 degrees + the reflection of the material that is a subtle diffused reflection.
.png)
Also this layer depends on the type of car and paint job. If we take a look into the Ferrari painting they add one more color to the gradient and from 0 to 40 degrees they add a vibrant color, stronger than the base giving some sort of SSS felling and also the reflection is more metallic. The ferrari example is going to be another post.
Now that we have the working set up lets see how we achieve that result
BASECOAT COLOR
To generate this effect we need to create a gradient mapping the colors to the faces depending on the camera angle. As they work on with a darker value near the 90 degrees and a higher value near the 0 degrees.
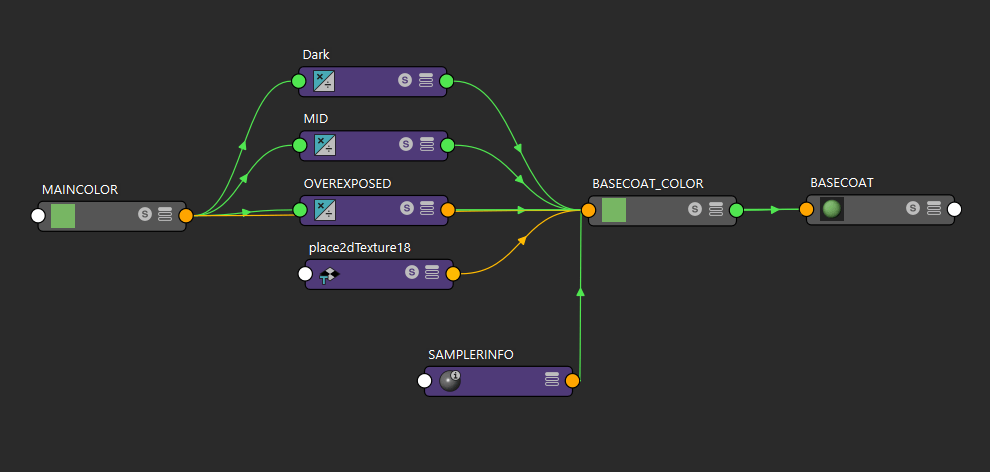
For that we need to start creating a new BaseCoat material and a ramp map (Fall off map if 3dsmax), this one is going to help us to define the colors of the gradient. And a sampler info to map the camera angles to follow the configuration of the reference, the node network should look like this.
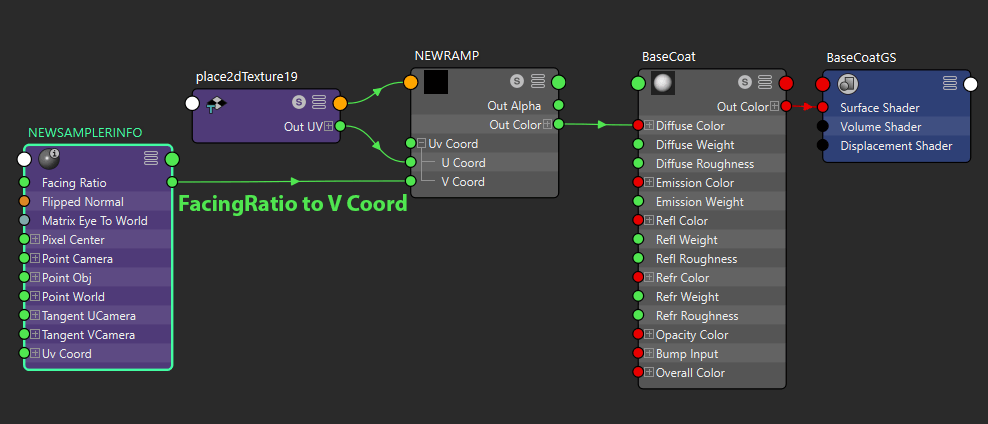
Connect the Facing Ratio of the sampler info to the V Coord of the Ramp, and the OutColor of the ramp to the Diffuse Color of your BaseCoat material. Your render should look like this now, the colors of the ramp should now follow the camera angles being 0 degrees white values and 90 degrees with the darker values.

Now for the second step we need to remove the influence of the reflection map to have a better feedback on the colors , My color approach is to always have one control for the main color on the materials, this way is really easy to change them and adjust the hole scene with less controls, but to achieve that you need to be sure on how to make it work.To control the color first create a Layered texture and name it MAIN_COLOR, this is going to be the general control of all the shader, I renamed the ramp to BASECOAT_COLOR because now that is going to be the control for the diffuse.
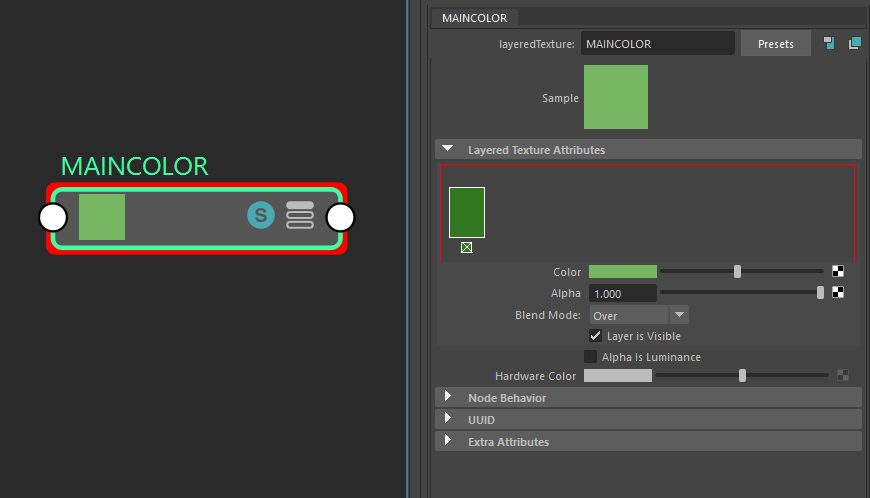
We already now that we are going to need 3 variations of the same color, close to 0 degrees, close to 90 degrees and 90 degrees, but the 90 degrees color is mostly because of the reflection, and to simulate the real world example we will need to add another color, the OVEREXPOSED, this one is going to generate a nice effect and a great blending, also this is the color that would help us when working with high end paint works like the Ferrari like SSS effect.
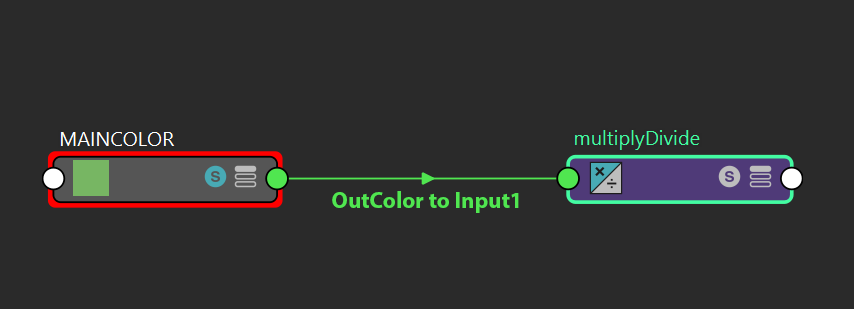
We already have the samples for the colors that we need, and for this process I used a multiplyDivide node. The multiply divide is going to help me to define the color variations, if I multiply by a number that is between 0 to 0.99 at the value of 1 the value is going to be the same and if its higher the value is going to be brighter. Just take into account that you need to set the 3 values the same amount to conserve the hue. Now lets see the connections.
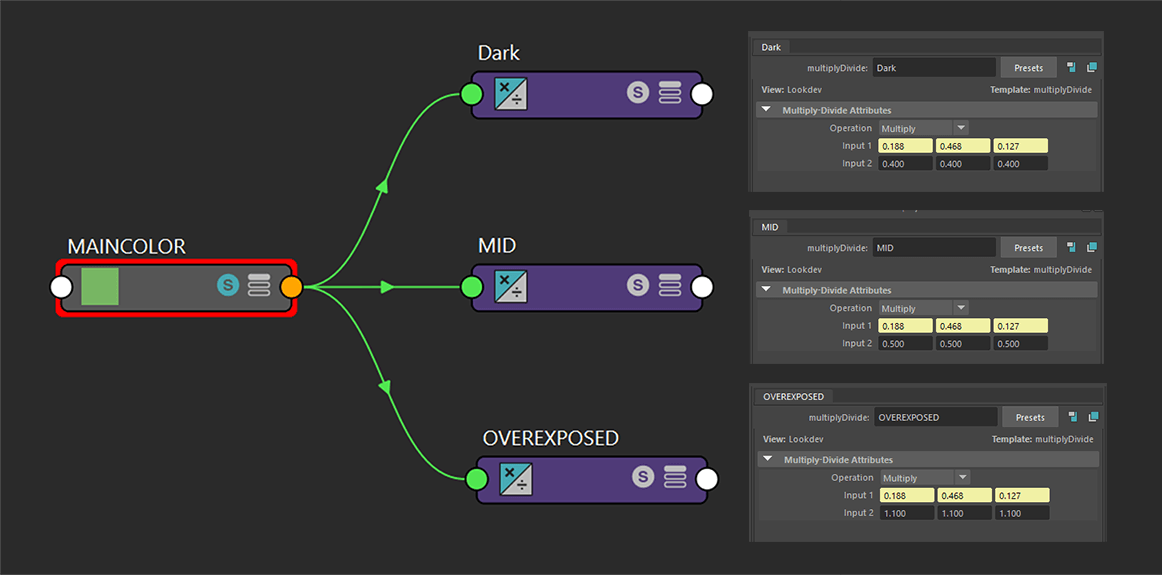
Duplicate the Multiply divide 3 times and name each of then as one of the colors of the gradient. For the DARK multiplyDivide the input2 Value is going to be 0.4, the MID is going to use 0.5 as the multiplier and lastly on the OVEREXPOSED we are going to use a 1.1 value, on Ferrari materials the value of the OVEREXPOSED can be higher to a 1.5 gives a nice result.
Now to generate the ramp effect we will add the multiply divides to the ramp slots to create the gradient. You can test and move the gradient depending on your goal and reference in this scenario I just decided to go with the reference.
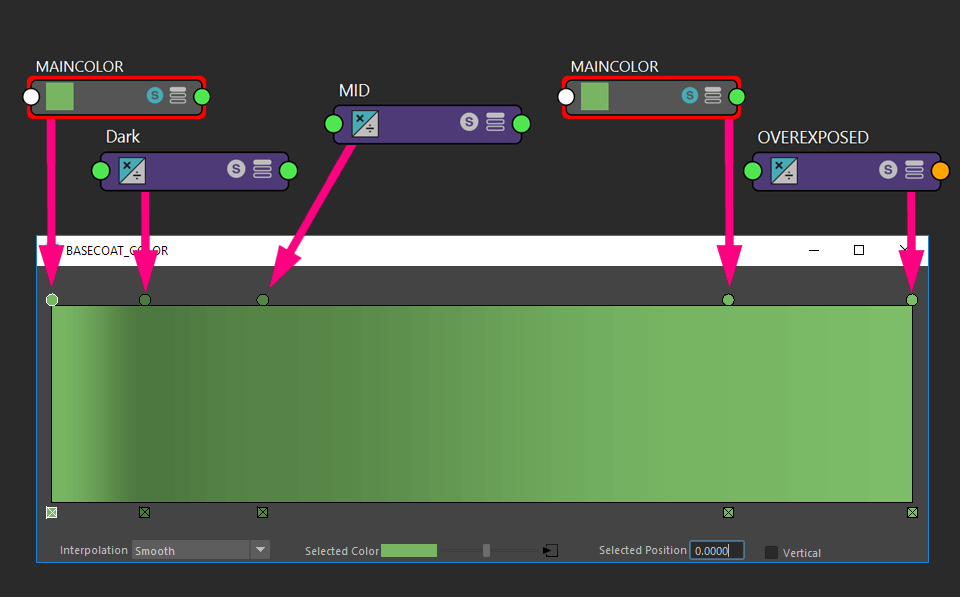
The left side of the ramp is the 90 degrees point and the right side of the ramp defines the 0 degrees. Remember to set the interpolation of the ramp to smooth, with this set up we can change the color of the MAIN_COLOR and all the BASECOAT is going to change also.

The result now should look like this without the reflections, As you can see we have a subtle rim color that is a little bit brighter, that is because we added the MAIN_COLOR to the mix, and this will help the reflection on the border to emulate better the reference.
BASECOAT REFLECTION
Now that we have the color working is time to add the reflection to the mix, here on the BASECOAT we have a really glossy reflection that can add a little bit of noise on some render systems, as I am using Redshift this is a non existing problem for here.
Now we want to have a nice and glossy reflection on the material so for that we need to change some parts of the material configuration first, the Weight value to 0.85 to reduce the bright points on the reflection, after that change the Roughness to value that goes from 4 to 6, the higher you go the glossy the reflection. For his examples I decided to use a value of 0.459. Next change the Fresnel Type to Color + Edge tint. Leave the reflectivity with a low value to reduce the contrast even further, and finally on the Metal Edge Tint value map the OVEREXPOSED multiply, this is going to give us an extra tint over the borders of the car.
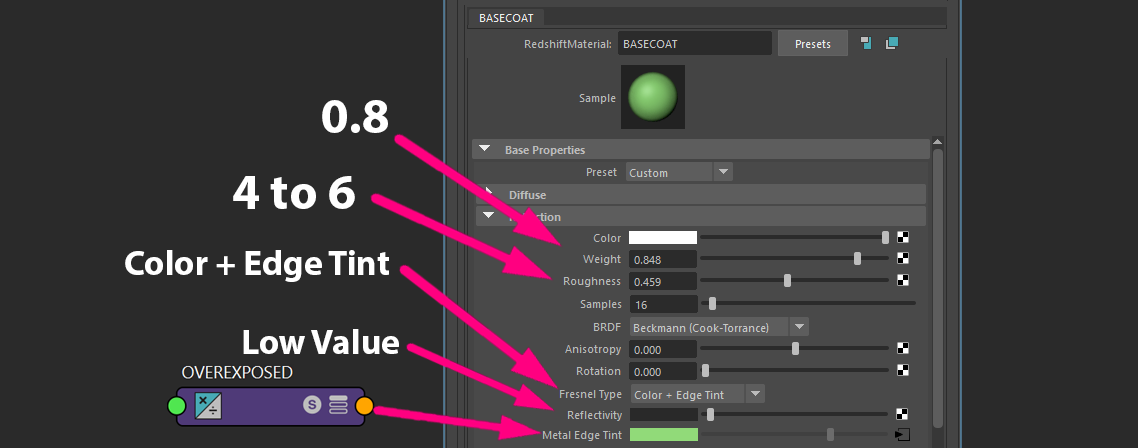
The result should look like this now with a “perfect” gradient and a nice soft reflection that adds part of that smooth and suave look to the reflection of the BASECOAT.
And the final network should look like this for the BASECOAT material.
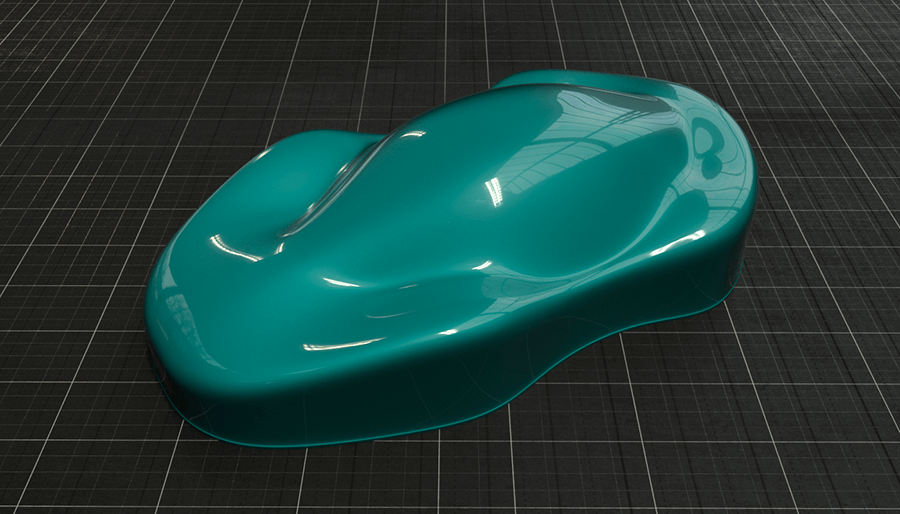
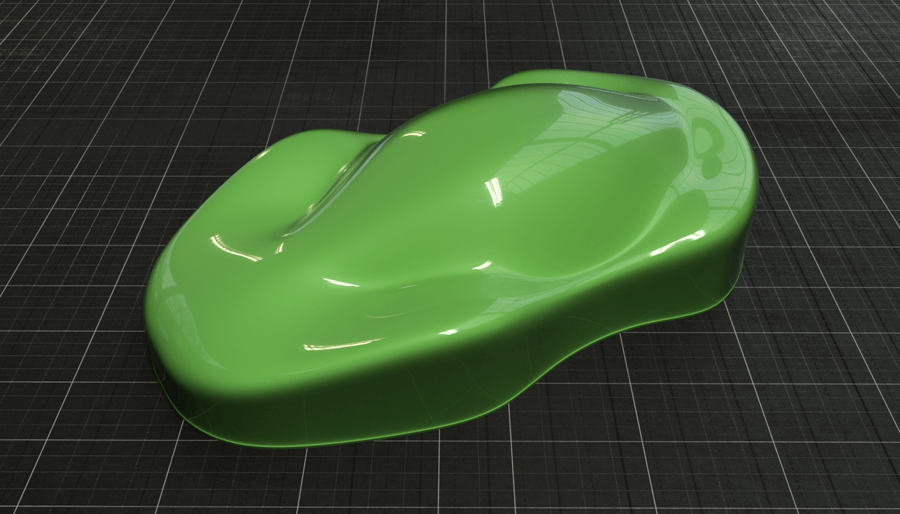
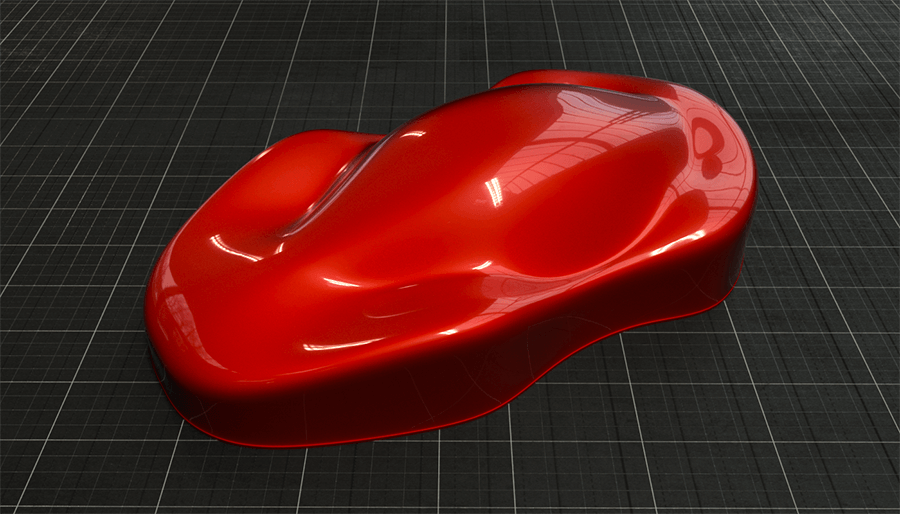
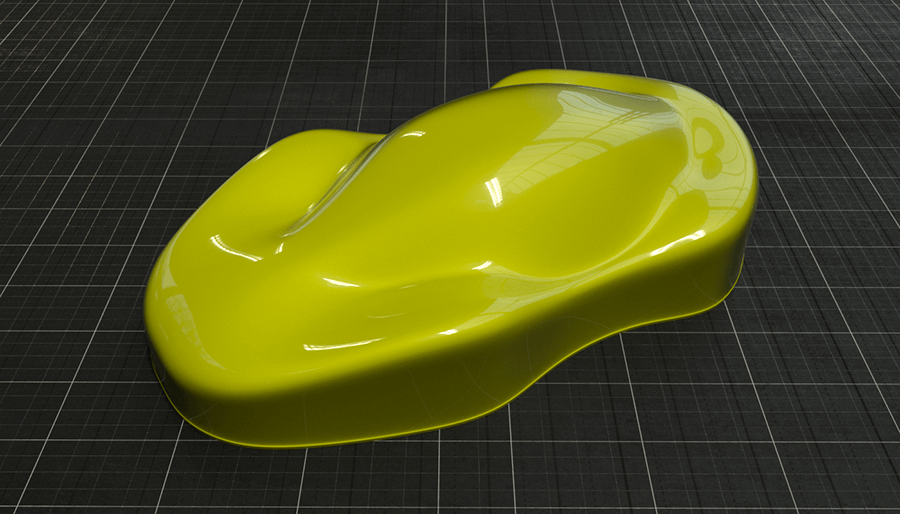
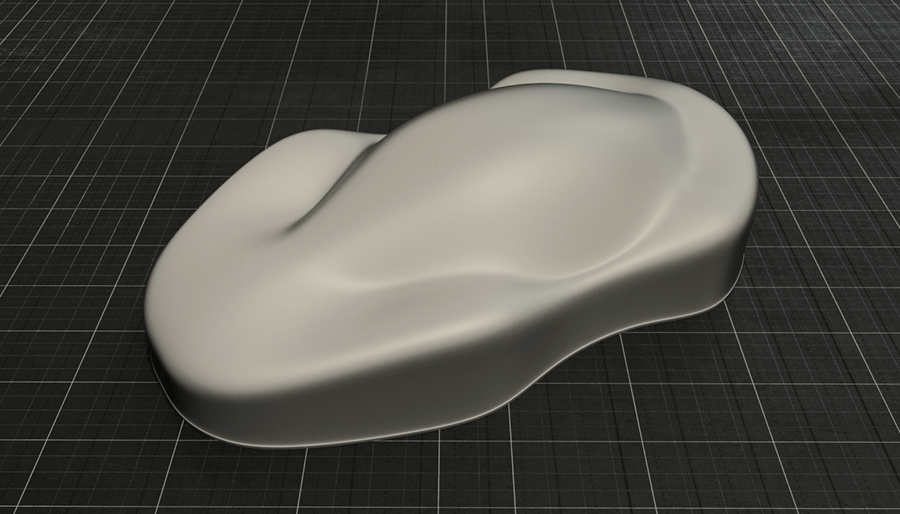
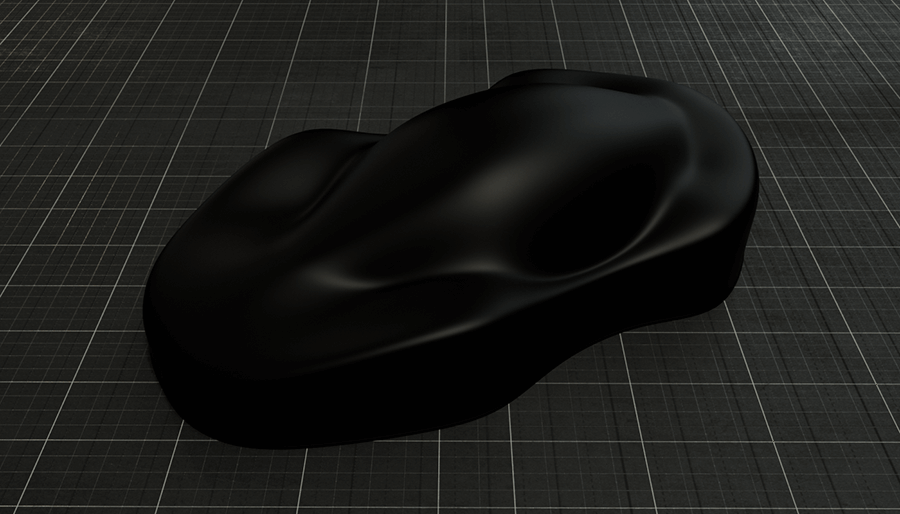
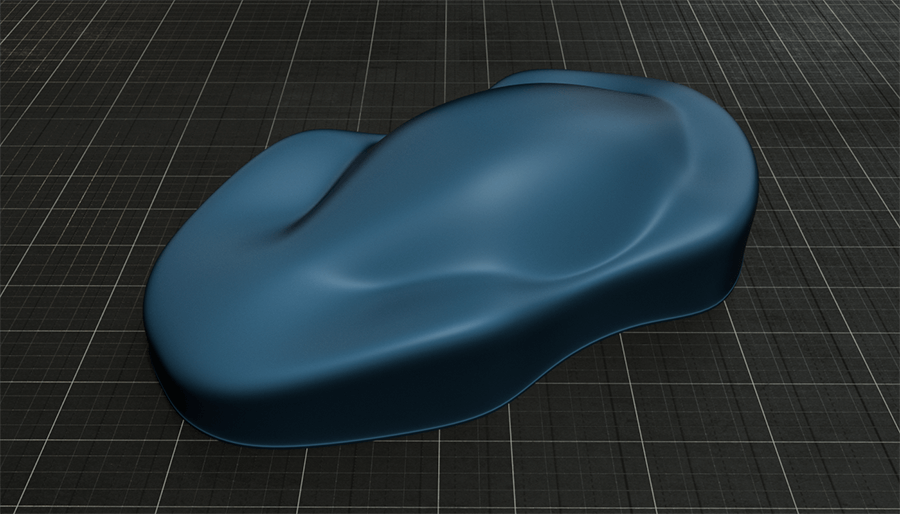
Remember that this is a ONE CLICK COLOR CHANGE material, and now when you change the MAINCOLOR you can actually change all the colors of the material and they will work normally and hold the configuration correctly. Here you can see some examples of how the color is working when you change it. Here you can find some examples, this renders are with a OVEREXPOSED value of 1.5.
The next part of the tutorial would be on how to generate the flakes and the finish coat and details. This same Material looks like this with the extra steps.
Again I wanted to thank you all for the support. Subscribe if yo want to receive the mail for the new release.


