
Hello, hello. For this month we want to share with you the amazing work of Dina Salama. She just finished an incredible grooming project and we are pleased to share her process with you. So without further ado, Dina Salama tells us about the process of creating The Kudu bull.
The kudu bull took around 3 weeks to be fully created from modeling, texturing, grooming and lookdev, having around 6 million hairs on its body. Software used: Maya, Zbrush, Yeti, Substance Painter & Arnold.
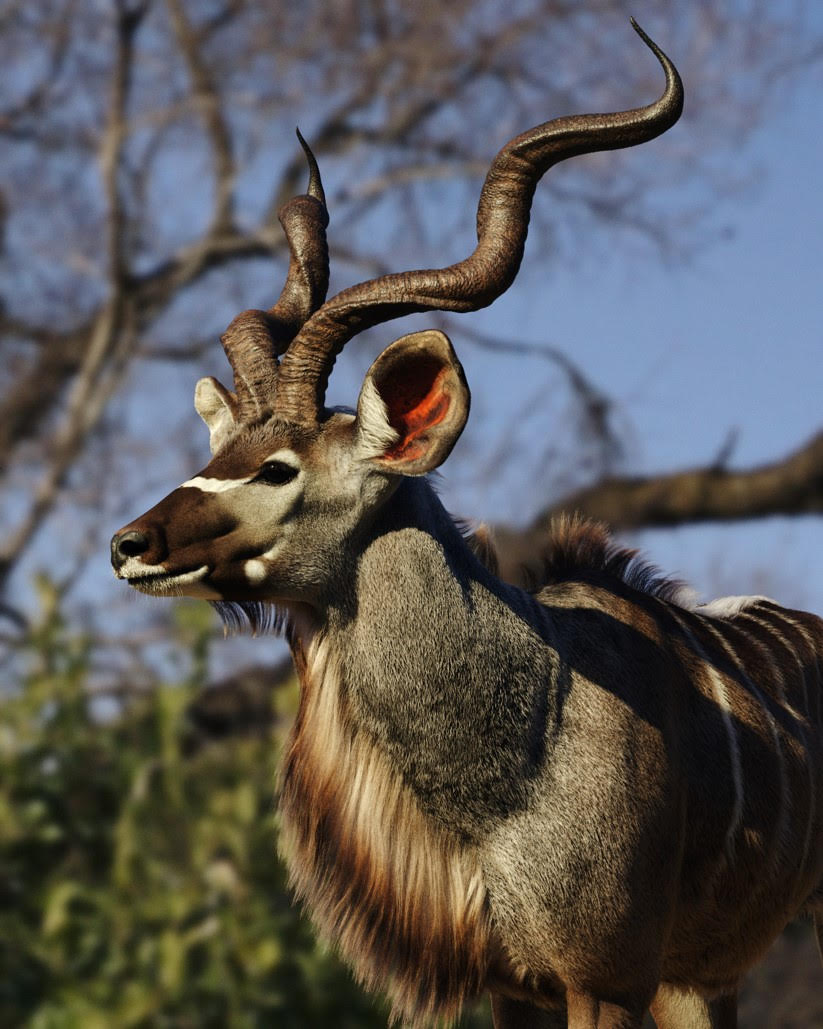
I started by gathering reference for the bull and analyzing the fur look. The approach I decided to go for was to paint masks separating the groom based the hair properties; clump size and color. They were slightly different in the neck, belly, legs, face and tail. I painted density masks to work on each area separately. I had a total of 9 groom nodes and 2 yeti nodes; one for the entire kudu bull and the other for the long hair down his neck, lashes and whiskers.


.jpg)

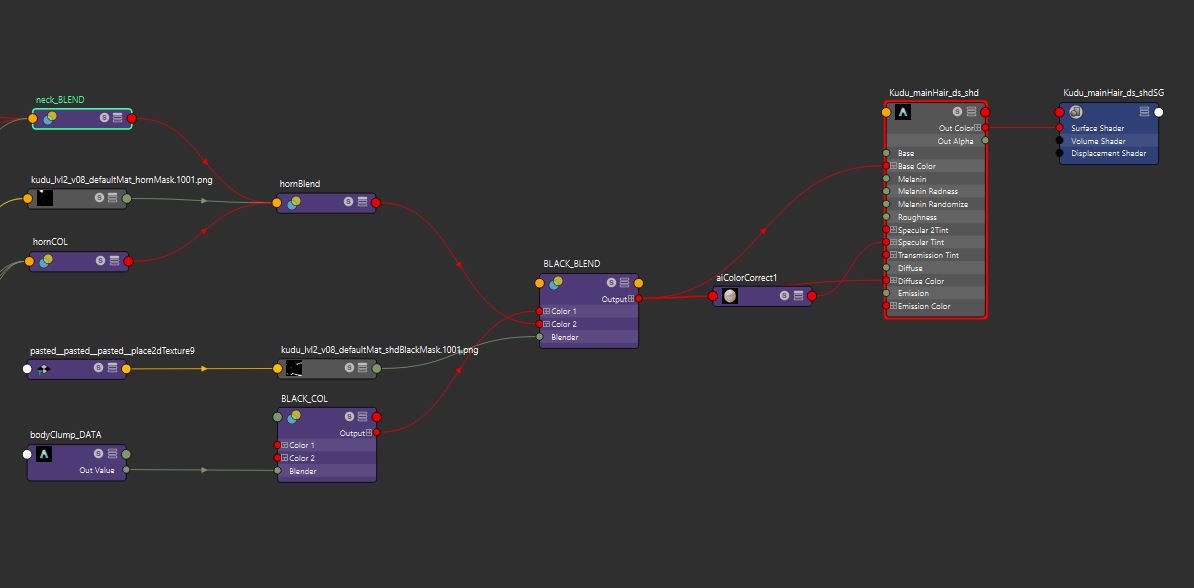
For each section, I created an attribute to sample clump IDs in yeti node. You can also create noise expression and use this attribute in Arnold Hypershade in a UserDataFloat node to blend between colors using BlendColor node.


When posing the bull, I had to adjust the groom guides in the neck as they intersected with each other creating a weird look, a simple way to adjust the groom is by using corrective grooming feature in Yeti. In your Yeti node tab, choose which groom node you'd like to tweak and add a corrective groom node to it. You can then adjust the guides to their new position. You can go back and forth between both positions using the corrective groom slider.

Final images
.jpg)
.jpg)
.jpg)
.jpg)
You can follow Dina in LinkedIn and Artstation to see more of her work.


